Download this page as an activity sheet (pdf, 95KB). Download this page as an activity sheet (pdf, 95KB).
Let's Get Physical
In this activity, you can:
Please follow any safety instructions highlighted like this in red.
Crystal growing
Growing crystals is great fun and it's easy too, though you'll need some patience.
The easiest way to start is to grow Epsom salts in a dish. Dissolve a tablespoon of
Epsom salts in five tablespoons of water and stir until all the salt has dissolved.
Pour the solution into a dark coloured dish and leave it on one side to evaporate,
preferably in the sunshine. As the water evaporates you'll see a lovely crop of
needle-like crystals form.
 With a little more care you can grow a large single crystal. Start by dissolving as much table salt as you can in a beaker of warm water. When no more salt will dissolve, pour a little of the water into a saucer and leave it in the sun to evaporate. Salt crystals will form. Notice that they look quite different to the crystals of Epsom salt that you grew in the same way. Now, select a nice large crystal from this crop and tie a thread to it (tricky!). Suspend this threaded crystal in the beaker of salty water by tying the thread to a pencil. If you leave it to stand undisturbed for a few weeks a large salt crystal will form.
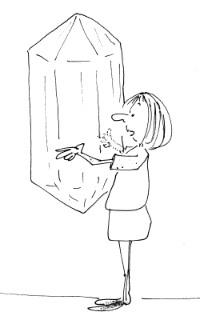
See who can grow the biggest crystal, but don't get as carried away as our friend in the cartoon! You can try this with table salt or with other crystalline materials too, such as sugar.
Can you find any other crystals? – further investigations (i)
Look out for crystals all around you. At home, you can often find some good examples in bottles of wine. These are crystals of tartaric acid formed as the wine ages in the bottle. You will probably also be familiar with honey, which can be a thick, clear liquid, or set and opaque. In set honey, the sugars have crystallised out. Out of doors, you will see that certain kinds of rocks,
such as granite, consist of millions of tiny crystalline particles.
Can you grow a crystal icicle? – further investigations (ii)
Now that you are really good at growing crystals, why not have a go at growing
a crystal icicle? You will need:
- bicarbonate of soda (baking soda),
- a piece of wool,
- paper clips,
- two glass jars,
- a saucer.
The diagram below illustrates what you have to build:
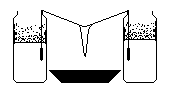
First, make a saturated solution of bicarbonate of soda and fill both jars with it (you can make this saturated solution by dissolving as much bicarbonate of soda as you possibly can in some water). Get a piece of wool and tie paper clips to either end. Suspend each end in the jars, with a saucer under the thread and leave to rest. As the solution soaks up and along the wool, it drips out and leaves a crystal icicle behind.
Back to the top.
How to make silly putty
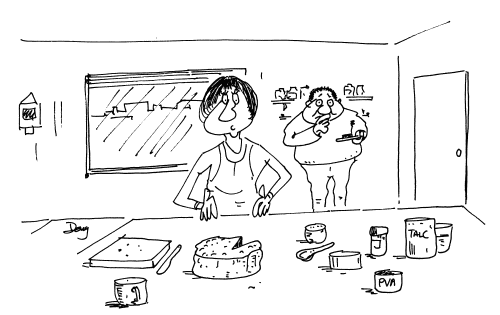
" ... but this silly putty looked just like a cake!"
To make silly putty, you will need:
- PVA glue (15ml, or 3 teaspoons),
- talcum powder (5 ml, or 1 teaspoon),
- food colouring (a few drops),
- water (25 ml, or 5 teaspoons),
- Borax solution (5 ml, or 1 teaspoon),
- a glass tumbler,
- a plastic bag,
- some paper towels.
You can buy PVA (polyvinyl alcohol) glue from craft shops, and you may already have some at home. Talc is optional, but it does seem to improve the elasticity of the silly putty. Borax powder is readily available from pharmacies and hardware shops, but you must be careful with it, as it is harmful when swallowed. Here's what you do to make your silly putty:
- Measure the glue into the tumbler (it doesn't have to be too exact). About 15ml
(three teaspoonfuls) is enough. The more glue you add the more silly putty you'll get.
- Next add about 25ml (5 teaspoons) of water to the tumbler and sprinkle
in one teaspoon of talc. Stir thoroughly with the spoon to mix the contents of the
tumbler until you have a smooth grey paste. Break up any clumps of talc that form at
the sides.
- Now add drops of the food colouring until you get the colour you want, but be careful not to add too much.
- You now have a tumbler full of colourful, watery glue. It's time for the magic ingredient: borax. Make a borax solution by stirring a heaped teaspoon of borax into a glass of water. Add a teaspoonful of this borax solution to your tumbler of silly putty and stir. Once the borax is mixed in thoroughly, take the spoon out and pull the putty off it.
- Work the solid material with your hands for a few minutes. At first it will be
quite slimy, but soon it will become smooth and dry. Have the paper towels ready
so you can wipe any colour and goo off your hands. You should lay out your plastic bag to protect the work surface. And there you have it: silly putty. Now your only problem is putting the infernal stuff down!
Wrapped up in a plastic bag or in an airtight container, silly putty will keep for as long as you want it. If the putty dries out then adding a small amount of water will take you back to the messy stage again. If the silly putty gets onto fabric or carpet it can be removed with a little vinegar followed by warm soapy water.
If you want to try your hand at making play dough
as well as silly putty, we have some recipes for play dough here. |